INNOVV K1 Motorcycle DashcamSystem Installation on 2008 Goldwing

My goals in mounting INNOVV K1 motorcycle dashcam system were to have easy access to the memory card and the trigger button to save video segments. I also wanted to minimize any interference the wiring would present during disassembly of the bike for servicing (removing plastic panels, etc.). My starting point was the following video, which places the recorder in the rear top case.
As mentioned in the video, having the recorder in the trunk requires ordering the system with a special request for the longer 6 meter cable for the front camera. While this cable is far longer than needed, the stock motorcycle cable is too short for this arrangement.
My installation follows the same basic concept but modifies the details for mounting most of the components.
Video recorder and power lines
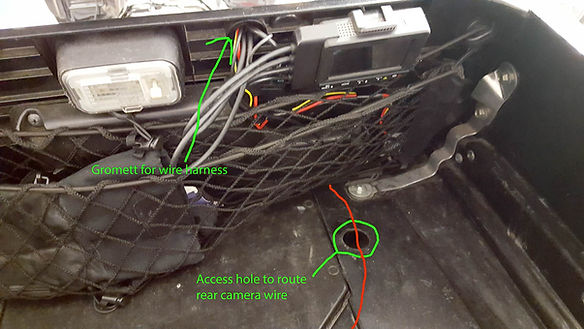
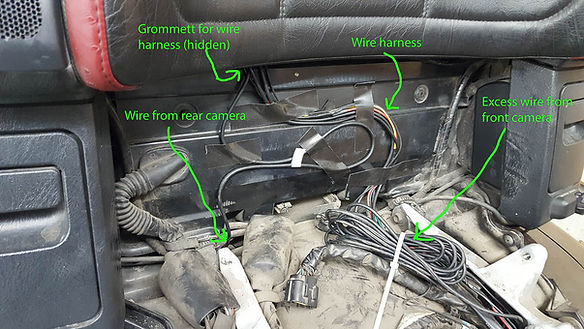
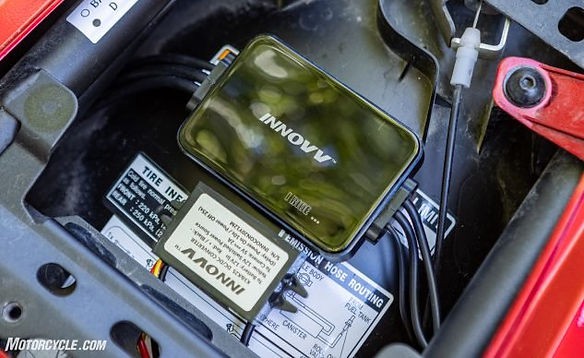
The recorder was placed in the trunk, which protects the unit from water and allows easy access to the memory card (Image 1 and 2). A hole was drilled in the front of the case, and a water-tight rubber grommet was used to pass all wires into the case. The wires were held in place to the front of the case using Gorilla tape in order to keep them organized (Image 3). All wires go through this grommet, including the rear camera wire. The wires to the front were routed under the seat, along the frame to their respective locations and were secured with wire ties. Note that the recording unit tilts down slightly and the bracket is not strong enough to hold it reliably. I have not yet decided how to address this issue.
Video Save button and GPS module
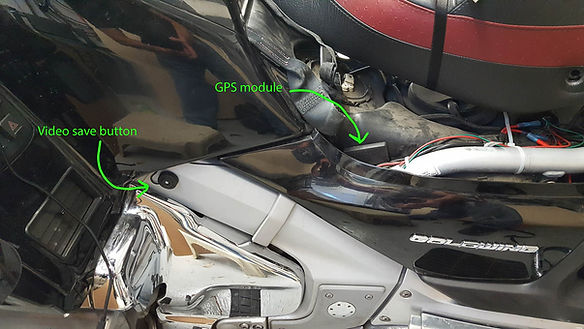
These are near each other, as shown in the below image. The save button is an important feature and should be in an accessible place. However, I expect that it will be used very rarely and does not need to be in top with the stock controls.
The location below allows easy access to the button, is a location that is not susceptible to accidental activation and results in wire routing that has no impact on disassembly of the bike for service.
The GPS module is in a location that should be relatively dry, is out of the way, allows the speaker to be heard on startup and keeps the wire out of the way during normal service operations.
Rear Camera
I mounted the camera under the rear case, to the side of the case opening levers, Since I have a trailer hitch, I did not want to mount the camera on the license plate as others have done. The license plate location complicates removal of the rear panel to get access to the hitch wiring harness. The location I used may also be a bit more stable, although the license plate mounting seems fine as well.
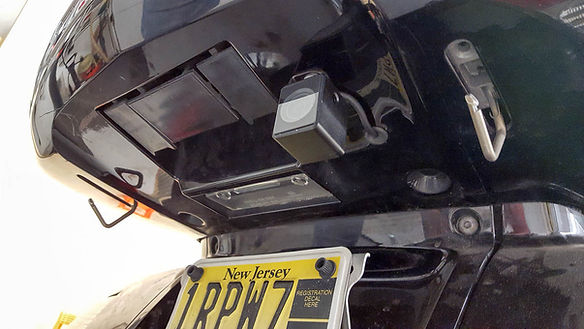
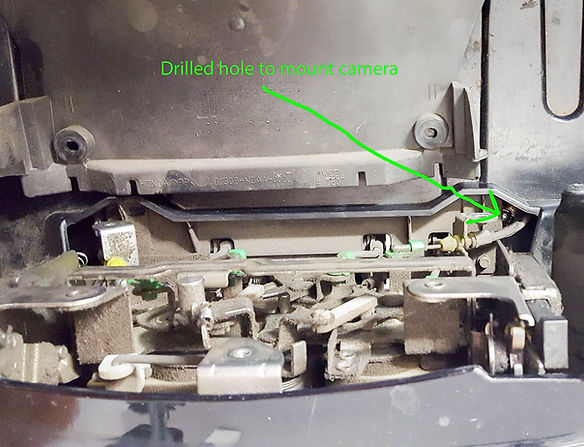
To mount the camera, I removed the rear cover, inside the case. This allows you to look through to the outer shell of the case and drill a hole to mount the camera (below image). I welded the mounting bolt to a large fender washer to provide more stability to the mounting (epoxy could also be used if a welder is not available). Positioning the washer inside the case is quite tricky because the space is very tight. If you drop it, you could easily loose it inside the case. Use a guide wire through the drilled hole to ensure the bolt and washer slide into the correct location.
A second hole was drilled to run the rear camera lead between the bottom of the case and the outer shell (Image 5). A rubber grommet was used to keep it water tight. Running this wire under the case housing to under the rear seat was difficult for two reasons. First, there was a wiring harness hidden inside where I drilled the hole and I was lucky I did not damage it. If you do the same, use extreme caution, drill very slowly and ensure you do not allow the drill bit to penetrate past the plastic case. The second problem was that threading the wire from this hole to under the seat was extraordinarily difficult and required may trial an error attempts using a long plastic cable tie as a probe (plus extensive swearing J). I managed it in two segments. The first section was from where the wire entered the case to the access hole, seen in Image 2. This can be pried open with a screwdriver from the inside the case. The next section, from the access hole to under the rear seat rest, was easier. The red line in Image 2 shows the approximate route for the wire under the floor of the top case.
Front camera
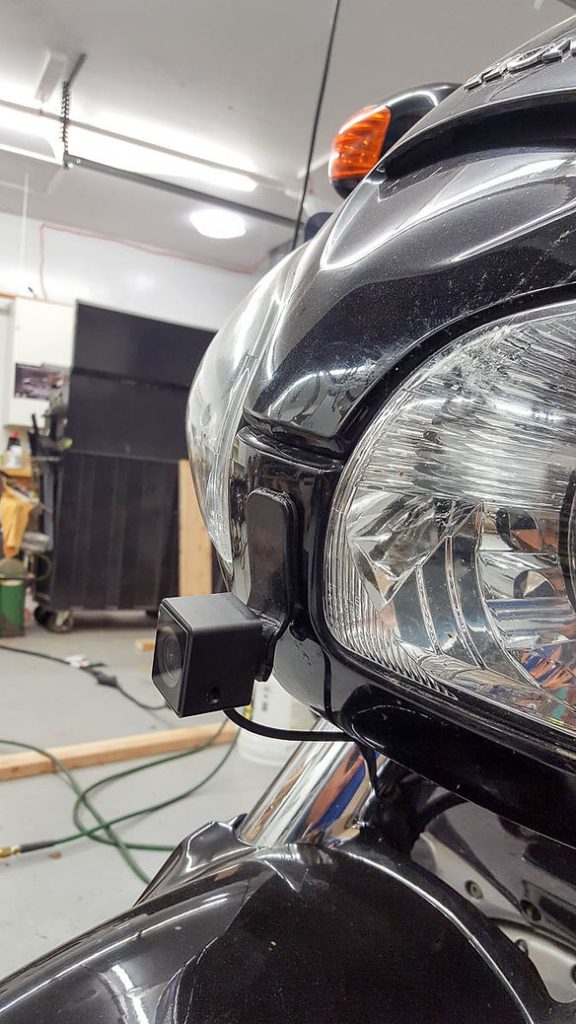
The front camera is mounted on a bracket made from a 25mm wide strip of aluminum, that was bent to match the curve of the front of the bike between the headlights (Image 7). It is attached with foam tape, low between the headlights to avoid drilling holes in the front of the bike. In addition to the curve, the bracket had to be twisted to point the camera straight ahead. As others have mentioned, the camera cannot be mounted below this area. The fork travel is enough that it would damage the camera and fender.
To route the front camera wire, remove the storage box and route it from the front through an existing gap that leads under the storage case (Image 8). I have the Goldwing Airbag model so the storage box is on the left side of the bike. Yours may be different.
Routing the wire the rest of the way to the back requires unbolting the trim and retaining bolts on the left side of the fairing. It is then routed along the frame, over the battery, to the back.

Responses