INNOVV K1 Motorcycle Dashcam Install on 2014 Honda Shadow Aero VT750C
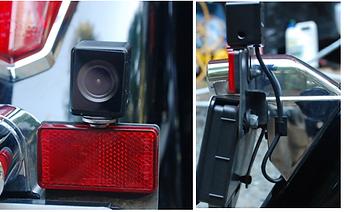
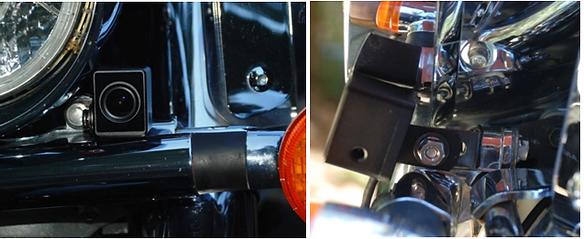
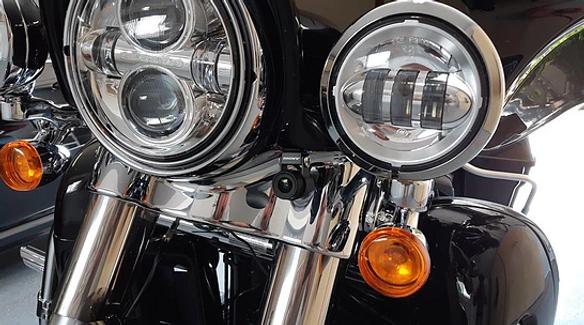
The Front camera was mounted on the front turn signal bar where it attaches to the fork. After testing I found that the provided angle brackets were not long enough, the camera needed to be extended at least even with the front of the headlight, a stainless U-Bolt (1/4-20×1-3/4×1) was used to provide the extra inch of reach, the U portion was discarded and the flat clamp part and nuts were used. The cable was routed along the frame under the gas tank into the battery area under the seat.
The extension, painted flat black, attached to the original angle bracket using a ¼-20 x ½” stainless nut, bolt, washer and lock washer. This extension got rid of the reflection from the headlight and the front fender in the video.
The Rear camera was mounted on the corner of the license plate holder where the reflector mounts on the License Plate Light housing.
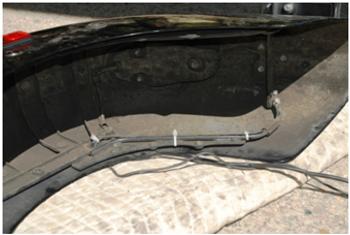
The rear camera required running the cable through the same opening the license plate light wires use, which required removal of the fender. There are 2 water drainage slots on the bottom of the fixture and I used one to run the cable through to the inside of the fender. The cable was be routed into the battery area under the seat.
The GPS is mounted to the rear fender under the seat using Velcro.
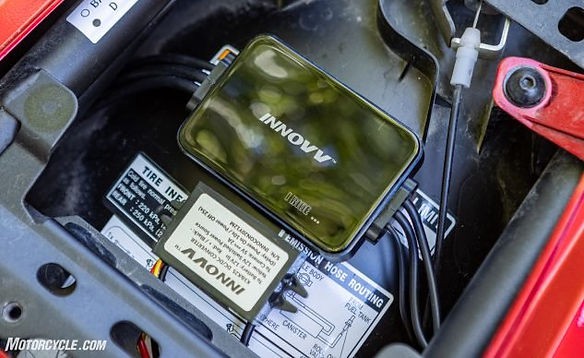
The Power Supply is under the Right Side Cover, behind the Fuse Block. Looking at the fuse block for a switched power source I found an open area under the first fuse that was connected to the ignition switch buss, I altered a solderless connector to fit into it and provide the switched source, the Red/Black cables were directly connected to the battery. The power supply is wire tied to the mounting post for the fuse block.
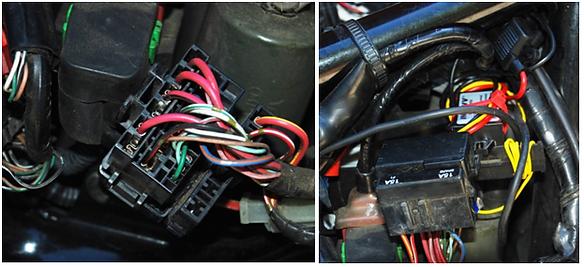
Bottom of the fuse block showing the location of the switched power source. Power supply attached to the mount behind the fuse block.
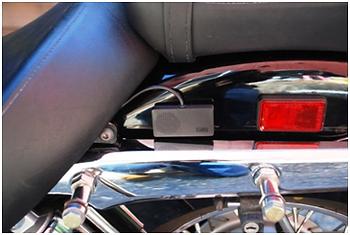
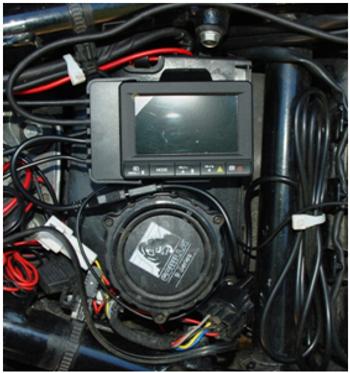
The DVR is under the seat on top of the battery cover.
Yes, that’s an alarm. If it wasn’t for that I would never have known a black bear was using my license plate as a bum scratcher!
The Control Button was placed on the top front of the Left Side Cover so it is just under my leg and reachable with my left hand if needed. It is attached using Velcro.
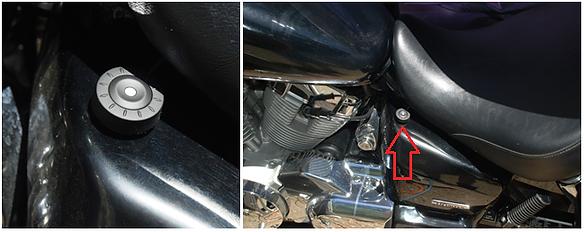
Both the Control Button and GPS are mounted with Velcro. When washing the motorcycle, since these are not waterproof, I can lift them off and place them in a Ziploc bag to protect them. They can also be relocated under the seat or under the Left Side Cover for rainy weather if needed.
Time: Around 3 hours. Be flexible, you may need to make changes on the fly to fit your needs.
I used a black Sharpie to color the edges (not the surface) of the camera lens protectors to prevent the washout I initially got from sunlight striking it at an extreme angle.
Problems: The only complaint I have about INNOVV K1 motorcycle camera install is that I have to remove the saddlebags and trunk to be able to remove the seat, the seat is bolted on so tools are needed. I tried setting up the DVR in my hard trunk, micro USB extension cables were necessary but the cable clamping device wouldn’t fit because the plugs were too large. Not very satisfactory, the cables kept working loose and causing intermittent recording so until USB extension cables that will fit the cable retainer can either be purchased or fabricated I will have to unbolt the seat to gain access to the DVR.

Responses